Triton 2-1/4HP Plunge Router
MOF001 KC
by
1 July 2006
It has been about 3 years since Triton Woodworking brought their innovative 3hp plunge router to the US. That router, the TRC001, has received many accolades from the woodworking industry and this slightly smaller version should garnish the same. Triton has improved upon the features of the original router while packaging it to better suit hand held use. In this review I'll endeavor to show you all the details of the router and this time have included some short video clips of the MOF001 KC in action. As usual just click on any photo to enlarge it for better viewing and thanks to Triton USA for providing the evaluation unit..
What's in the Box:


The MOF001 KC includes a lot of stuff.
The router is packaged in a plastic storage case which is also designed to
secure all the accessories. The kit includes the Router, above table
crank, wench, 1/2" and 1/4" self releasing collets, 7 guide bushings and
associated adapters including a PC bushing adapter, offset base with built in
circle cutting guide, fence, top and bottom dust collectors, a 1/2" straight bit
and instruction manuals. All of this fits securely in the case.
Power: 2 ¼ HP Peak, (13 Amps)
Speed Control: Variable Speed with soft
start and continuous speed control under load
RPM: 8,000 – 21,000
Collet/s: Full ½” and ¼” collets
included
Plunge Range: 0” to 2 5/16”
Micro Adjustment range: Infinite throughout full plunge
Dust collection: Integrated dust port
Through table adjustment: YES – Winder handle included
Weight: 10.4 lbs (4.7kgs)
Base Dimensions: Base 6 ½”, Opening 3 5/32”
Country of Origin: PRC (Australian design)
Warranty: 30 day satisfaction - 2 Year manufacturers defects
Accessories: 7 piece template
guide kit, full function fence and circle cutter, ½” & ¼” collets & winder
handle, bit
Controls:

 During
the next set of descriptions you can refer to these photos for location
information. The MOF001 is best suited for a right handed operator.
You can in the picture at left which I've labeled "Front View" that the two most
often used controls, the winder and plunge lock on on the right. Being
right handed myself I cannot comment on how this layout would accommodate a left
handed operator.
During
the next set of descriptions you can refer to these photos for location
information. The MOF001 is best suited for a right handed operator.
You can in the picture at left which I've labeled "Front View" that the two most
often used controls, the winder and plunge lock on on the right. Being
right handed myself I cannot comment on how this layout would accommodate a left
handed operator.

 The
Power switch and its interlock cover are located on the upper left of the router
as a right handed person would orientate it. The interlock switch cover is
slid away from you with your thumb and the the lighted rocker switch engaged buy
toggling it down once the cover frees it. This can be performed all in one
motion and is very easy to do. The switch cover is interlocked with the
height adjustment and prevents the router from being raised high enough for the
arbor lock to engage (the only way to change the bit) unless the power switch is
off. I my opinion this is a great safety feature and has no negative
affects. I've heard of people complaining that when mounted in a table and
using a remote power switch is gets in the way but that just isn't an issue in
my opinion. In order to raise the router (either the MOF001 or the TRC001
you must reach under the table to unlock the plunge mechanism anyway so the
added step of turning off the power switch is inconsequential when compared to
the safety benefit. The switch also has a dust boot like its big brother.
The
Power switch and its interlock cover are located on the upper left of the router
as a right handed person would orientate it. The interlock switch cover is
slid away from you with your thumb and the the lighted rocker switch engaged buy
toggling it down once the cover frees it. This can be performed all in one
motion and is very easy to do. The switch cover is interlocked with the
height adjustment and prevents the router from being raised high enough for the
arbor lock to engage (the only way to change the bit) unless the power switch is
off. I my opinion this is a great safety feature and has no negative
affects. I've heard of people complaining that when mounted in a table and
using a remote power switch is gets in the way but that just isn't an issue in
my opinion. In order to raise the router (either the MOF001 or the TRC001
you must reach under the table to unlock the plunge mechanism anyway so the
added step of turning off the power switch is inconsequential when compared to
the safety benefit. The switch also has a dust boot like its big brother.
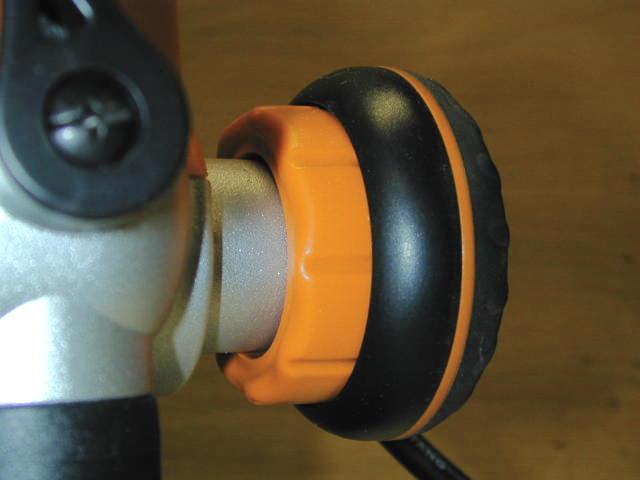
 As
I stated earlier, the winder is one of the most often used controls. To
operate it you grasp the handle and squeeze the orange collar, pulling it into
the black handle. This releases the mechanism and allows you to rotate it
forward (clockwise) to plunge or back to raise. It does take some getting
used to. You can also disengage the winder mechanism and have it operate
as a normal plunge router.
As
I stated earlier, the winder is one of the most often used controls. To
operate it you grasp the handle and squeeze the orange collar, pulling it into
the black handle. This releases the mechanism and allows you to rotate it
forward (clockwise) to plunge or back to raise. It does take some getting
used to. You can also disengage the winder mechanism and have it operate
as a normal plunge router.
Click on the pic at right for a short video
demonstration of the plunge mechanism.
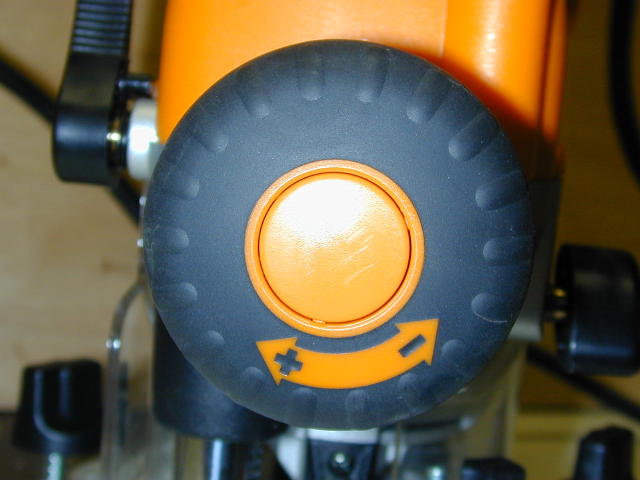
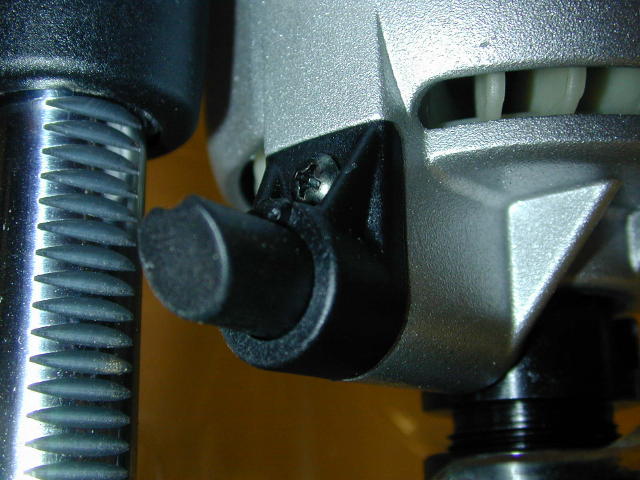
The mechanism for locking and unlocking the winder mechanism has chanced since the original router (left). Now you have a simple push button. Pushing it in toggles between engagement modes.
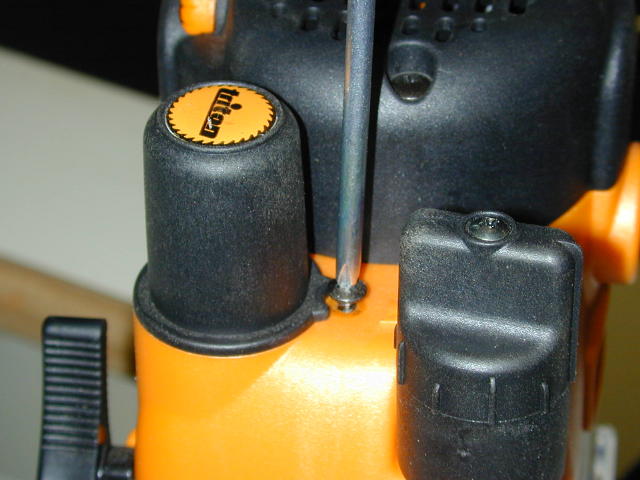
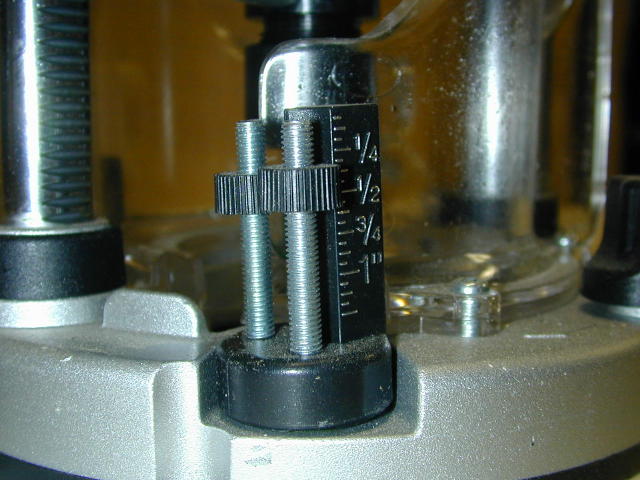
The photo at right shows the depth stop
turret. It works similar to most standard depth turrets but you'll notice
that this one looks a bit loose....it was. The screw which attaches it was
loose and had to be fixed with instant glue so it wouldn't loosen when the
turret was rotated counterclockwise. More on that later.
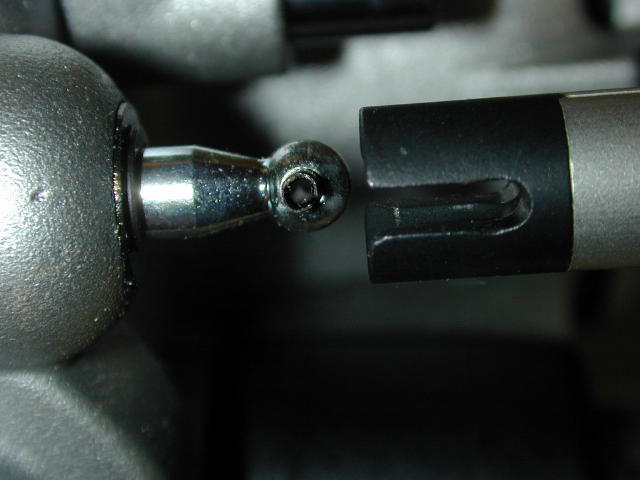
 The
spindle or arbor lock is shown at left. When the router is plunged all the
way the router's base depresses the locking rod and locks the arbor. The
power switch interlock prevents the router from plunging far enough to engage
the lock unless the power switch is in the off position.
The
spindle or arbor lock is shown at left. When the router is plunged all the
way the router's base depresses the locking rod and locks the arbor. The
power switch interlock prevents the router from plunging far enough to engage
the lock unless the power switch is in the off position.
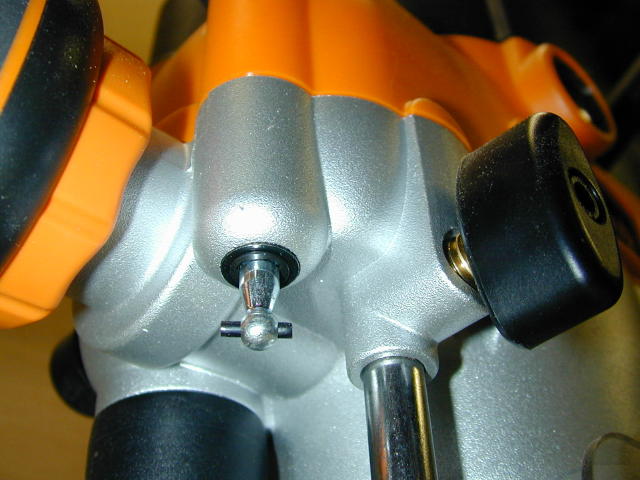
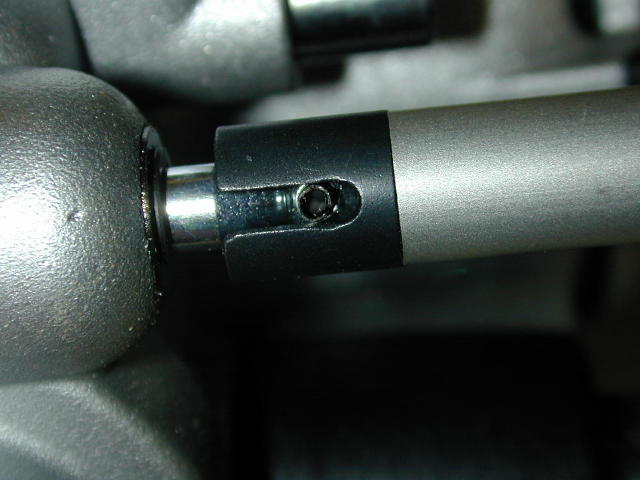
At right is the table winder (crank) connection point and the depth stop rod and lock.
The photos below illustrate how the winding crank attaches to the router. When I first saw this I thought that inserting the crank from the top through the table insert was going to result with a lot of fiddling and feeling around to get the crank to mate with the connecting ball but that was not the case as you will see in a later video.
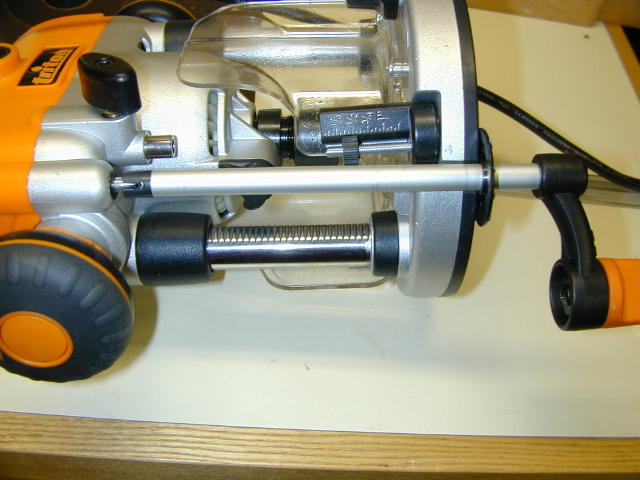
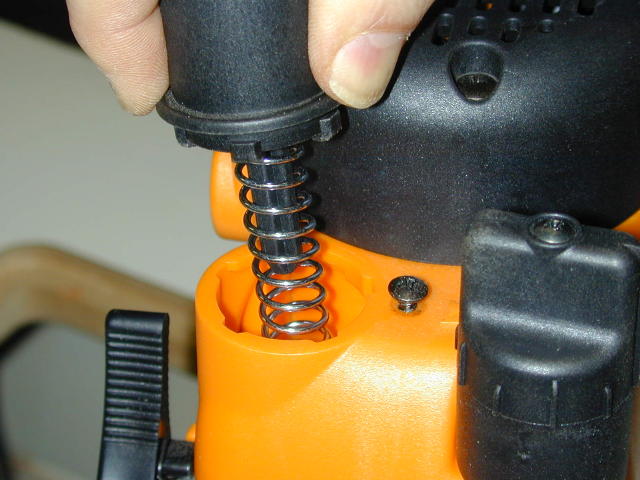
If you plan on using the router in a table then you'll want to remove the plunge spring and Triton has the easiest spring removal mechanism I know of. As shown below just loosen the screw, twist the cover and remove the spring. UPDATE Nov 2008: Failure to remove the spring when using the above table winder may cause premature failure of the worm gear in the winder assembly.