Festool OF 1010
Plunge Router
by
25 Jan 2009
I'm a firm believer in the woodworking axiom that one can never have too many routers and to that end, I purchased a new Festool OF 1010 plunger router from Bob Marino. I was looking for two things, something black and green to fulfill my need for a new Festool and something small. I have a number of routers, Triton's, Milwaukee's, Bosch and even a Craftsman ranging in size from large to trim but I was looking for something to fall in love with. All reports were that the OF 1010 was one such router so after some deliberation I clicked the "Buy" button on Bob's site.
As with all my reviews I'll try to touch on every feature of the tool and use plenty of photos. Click on any photo to expand to a larger size. Since many people purchase tools over the internet and don't actually get to touch them until after purchase, my goal is to present enough information so that you can make an informed decision and not be surprised by anything that is or isn't in the box.
What's in the Box!

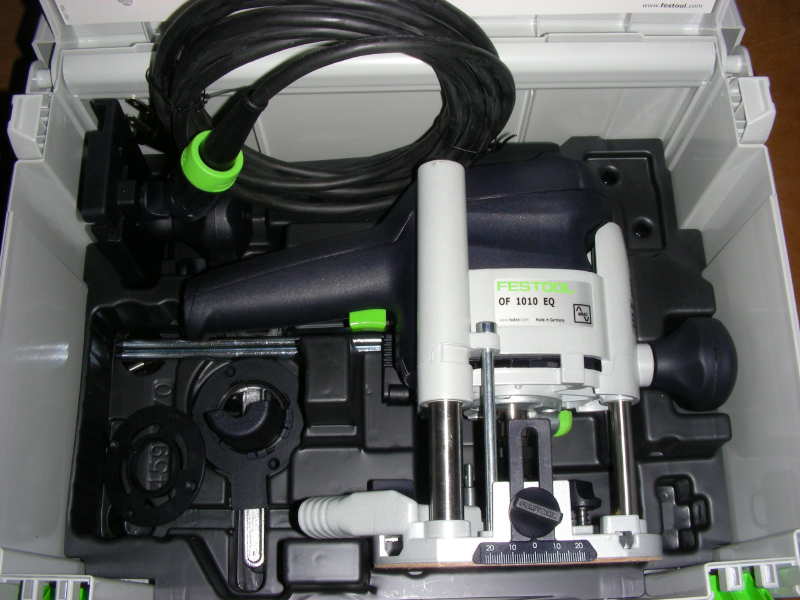
The OF 1010 comes shipped in a Systainer (size 3) which is wrapped in bubble wrap and then placed in a cardboard box for shipment. Mine arrived two days after ordering undamaged from the new Festool Fulfillment center in Ohio. The accessory items were out of place in the Systainer, a common occurrence with Festool shipments because the accessories just sit in recesses in the molded plastic insert and are not secured in any way. The router itself however is secured and was not jostled around in the Systainer.
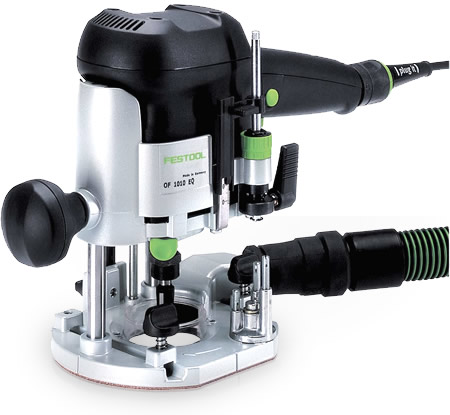
The photo at left shows all the pieces; OF 1010 router (#1), Guide Stop (#2), Guide Bushing adapter (#3), Chip Catcher (#4), Two Guide Rods (#5), 19mm Wrench (#6), 1/4" and 8mm Collets (#7, 2 places), Plug-It Power Cable (#8) and the Manual and warranty card (#9).
The photo at right shows all the parts in their proper place in the Systainer 3. The Guide Bushing Adapter doesn't have a specific place because I believe it was added after the original release due to customer demand.
Technical Specifications:
Power consumption: 1010 W (8.4 amp 120 v AC)
Drive shaft speed: 10000 - 23000 rpm
Quick height adjuster range: 2.165"
Fine height adjuster range: 0.315"
Weight: 6 lbs
The OF 1010 has an electronic controlled motor
that Festool refers to MMC Electronics. The electronic control provides
for a constant speed under load for a better and more consistent cut. It
also features step-less variable speed for different routing applications and
overload protection. I'll probably repeat this again in the review
but Festool has the best soft start I have ever used. When starting a
Festool router there is absolutely no, zero, zilch startup torque felt by the
operator.
The Router:
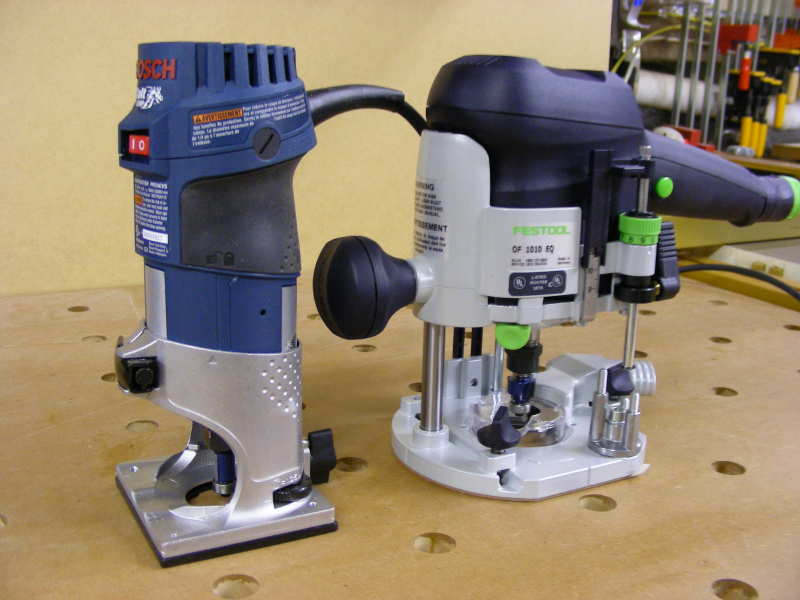

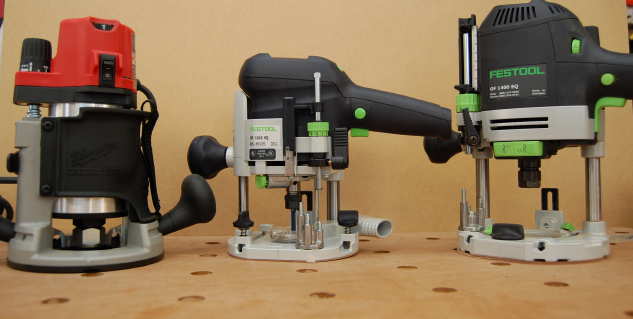
The OF 1010 is a small and comfortable full featured plunge router. You see it pictured here on the left next to the Bosch Colt 5.7amp VS trim router and on the right paired with its big brother, the OF 1400, and lastly with the Milwaukee 5616 below for a size comparison.
As I said in the opening remarks I was looking for something that would handle much of my routing tasks and that would be comfortable and lightweight. For me, my hand routing is primarily edge treatments so small and light is important but I also wanted more power than a trim router.
At 6 pounds the OF 1010 is a bit heavier and larger than the Colt and obviously requires two hands to operate but it is very light as routers go and is comfortable to handle and operate.
 OK,
starting from the top we'll point out the features and controls of this router.
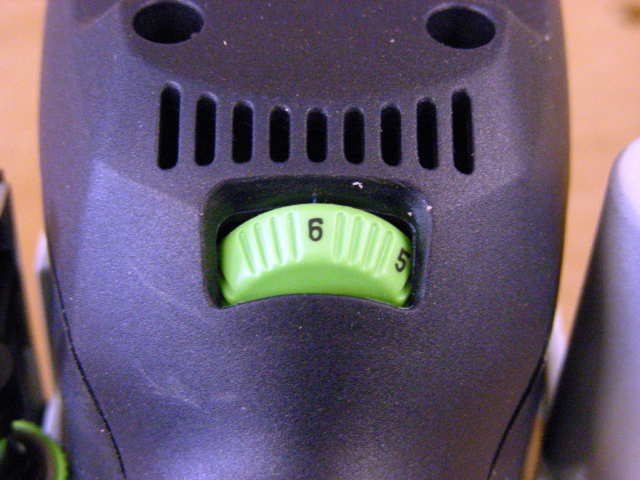
The first control you see right on the top of the router is the speed knob which
is pictured at left. This knob, located at the base of the handle is
within thumb reach if you need to adjust the speed between 10,000 and 23,000 rpm
while routing. To start the router Festool uses a trigger switch.
This is simply on and off and not variable speed as you may have experienced
using this type of power switch on a Jigsaw or similar. The trigger
(right) can be locked in by squeezing it and then pushing the button in towards
the handle....an operation which should be familiar to most users because it
acts just like the lock on a drill or Jigsaw. To release the lock you just
squeeze the trigger again and let go.
OK,
starting from the top we'll point out the features and controls of this router.
The first control you see right on the top of the router is the speed knob which
is pictured at left. This knob, located at the base of the handle is
within thumb reach if you need to adjust the speed between 10,000 and 23,000 rpm
while routing. To start the router Festool uses a trigger switch.
This is simply on and off and not variable speed as you may have experienced
using this type of power switch on a Jigsaw or similar. The trigger
(right) can be locked in by squeezing it and then pushing the button in towards
the handle....an operation which should be familiar to most users because it
acts just like the lock on a drill or Jigsaw. To release the lock you just
squeeze the trigger again and let go.
I said I'd mention it again so I will, when you squeeze the trigger the router will start up smoothly and without transmitting torque. It's is a pleasure to use.

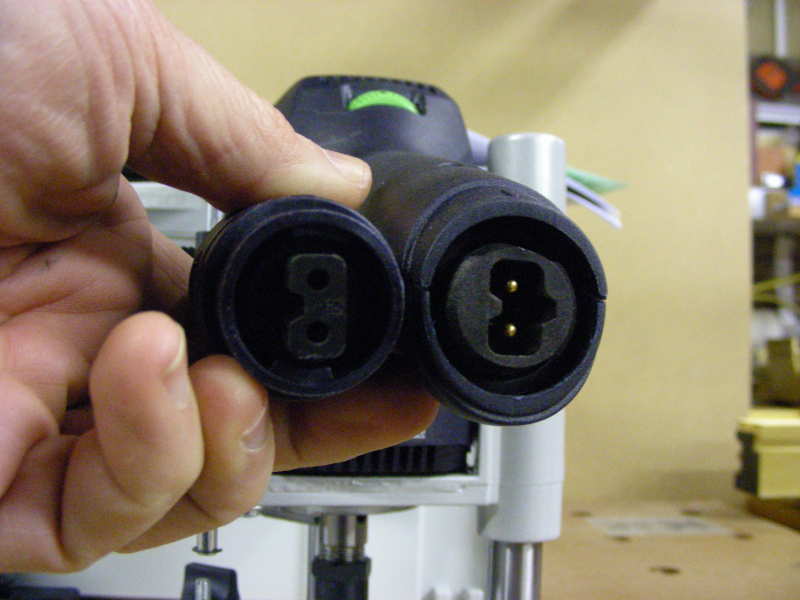 Moving
down to the end of the handle we see the Plug-It receptacle. A note on
Festool Plug-It cords. Festool supplies either of two gauges of power cord
depending on the wattage of the tool and control which tool can use what by
keying the connector. The OF 1010 is keyed for the smaller gauge Plug-It
which allows either cord to be used. My router came supplied with the
heavier gauge cord (pic Left) which was welcomed but did surprised me. I
don't know if this is the standard or an oversight.
Moving
down to the end of the handle we see the Plug-It receptacle. A note on
Festool Plug-It cords. Festool supplies either of two gauges of power cord
depending on the wattage of the tool and control which tool can use what by
keying the connector. The OF 1010 is keyed for the smaller gauge Plug-It
which allows either cord to be used. My router came supplied with the
heavier gauge cord (pic Left) which was welcomed but did surprised me. I
don't know if this is the standard or an oversight.
To attach the power cable you line up the connector, push it in and twist it until it locks. Some users have complained that their power cords fall off during use but that is user error as they are not twisting the connector for enough for it to lock. There is a short demonstration video which can be selected by clicking on the photo at right.
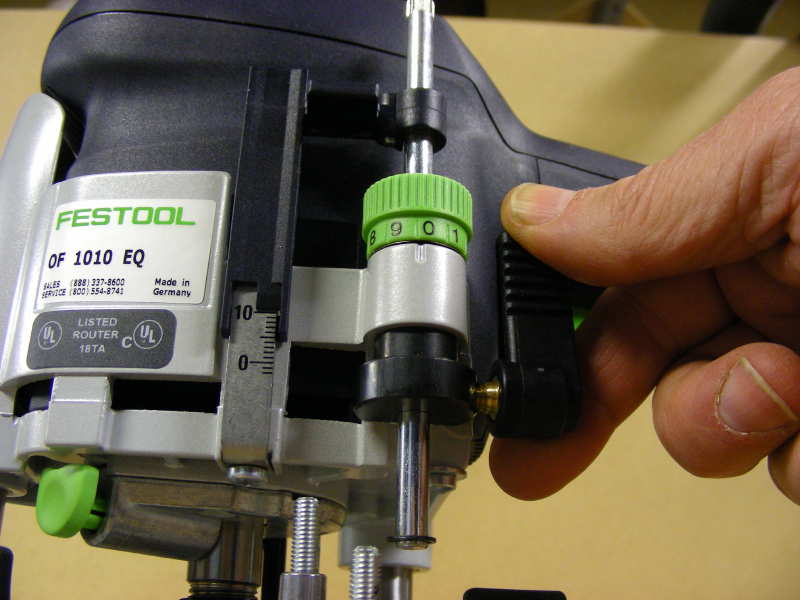
 Looking
at the router with the handle on your right you'll see the depth stop (pic at
left). The depth stop and locking lever allows you to control the amount
of plunge and thus the depth of your cut. We'll get into its operation
later in the article when I describe the OF 1010 in use. In order for the
depth Stop to function you also need some thing to reference it to and Festool
like many other manufacturers uses a turret system (right). The steel
turret has three positions, each one individually adjustable for fine tuning
your cut.
Looking
at the router with the handle on your right you'll see the depth stop (pic at
left). The depth stop and locking lever allows you to control the amount
of plunge and thus the depth of your cut. We'll get into its operation
later in the article when I describe the OF 1010 in use. In order for the
depth Stop to function you also need some thing to reference it to and Festool
like many other manufacturers uses a turret system (right). The steel
turret has three positions, each one individually adjustable for fine tuning
your cut.
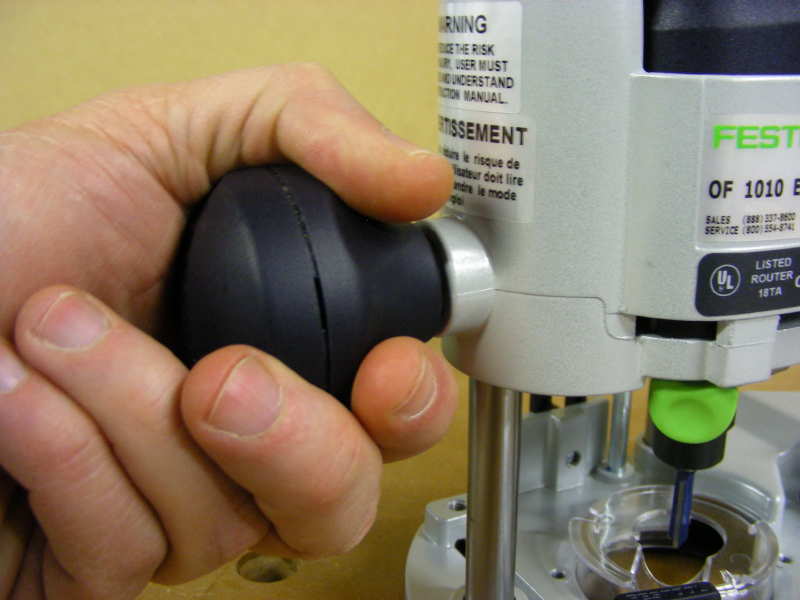
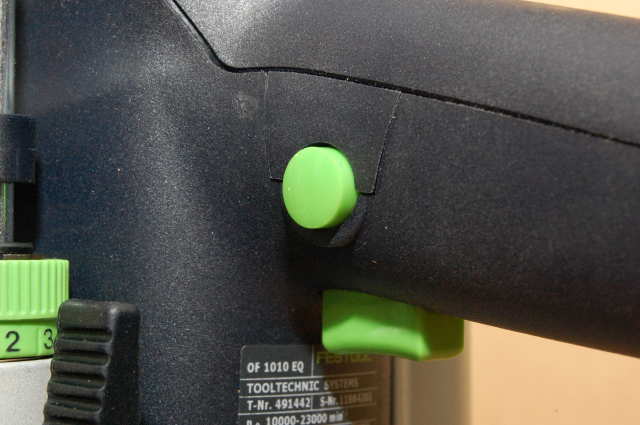
Most routers utilize a lever to release the brake and allow the router to be plunged but Festool ingeniously incorporates that function into the knob handle (right). To release the brake you twist the knob counterclockwise and to tighten, clockwise of course. This allows you to keep full control of the router and not go searching with your thumb for a lever.
The router uses a spring to both provide some resistance to the plunge and to return the router to it's full up position.
 Now
we're down at the base and this is where we attach the guide bars which are used
for the Guide Stop, Edge Guide accessory and other attachments.
Now
we're down at the base and this is where we attach the guide bars which are used
for the Guide Stop, Edge Guide accessory and other attachments.
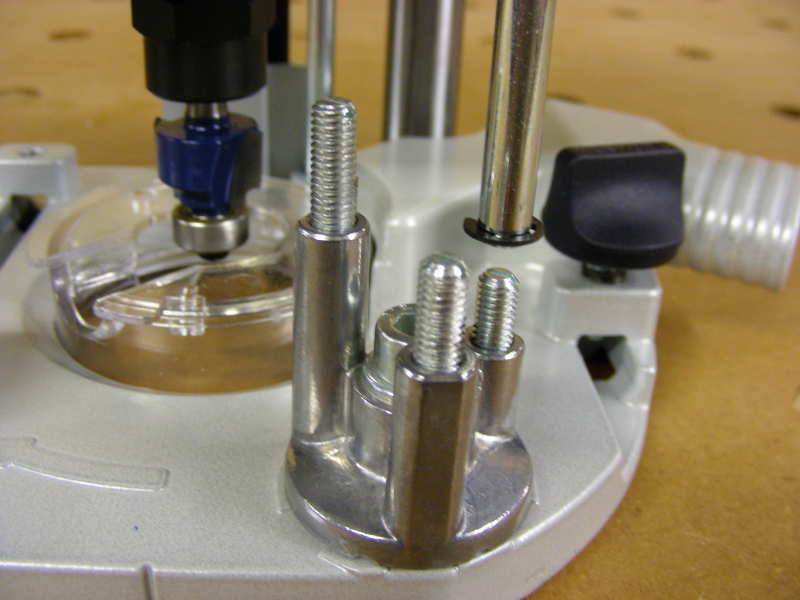
The easiest way to attach the Guide Stop is to slide the two Guide Bars into the plate and lock them by cinching down on the thumbscrews (left). Next take that assembly and slide it into the corresponding slots on the router base and again tighten down the thumbscrews (right).
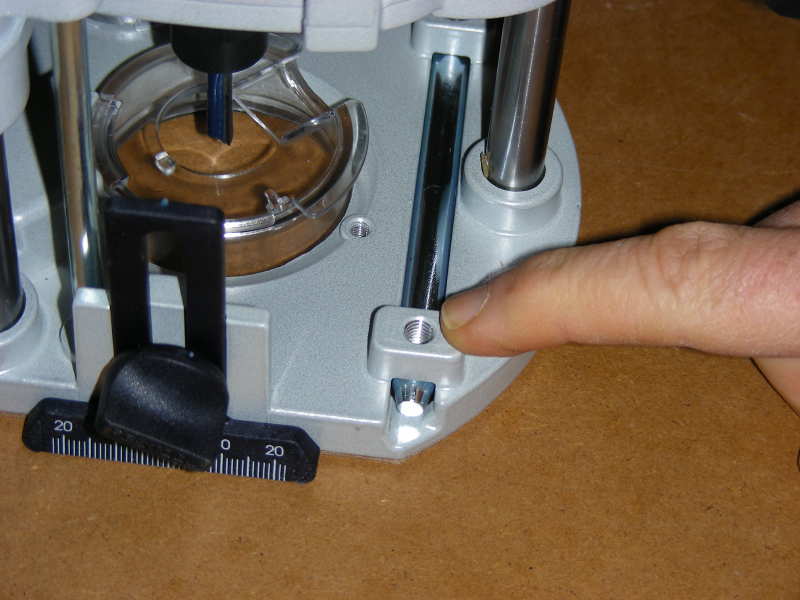
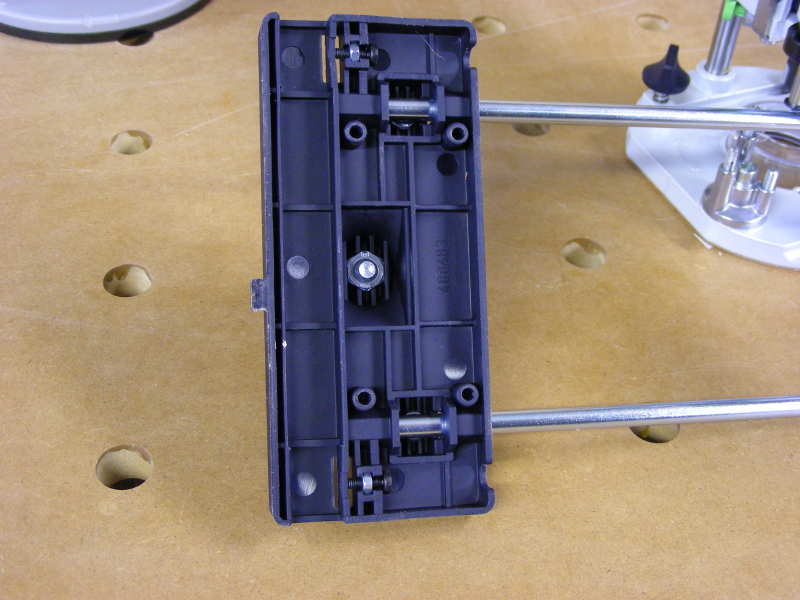
The knob on the guide plate is just that, a knob for holding the plate. At left you can see the underside of the Guide Stop. There are 4 holes that could capture screws for the imaginative DIY'er.
You'll also find a threaded hole (pic right) with nothing in it but not to worry, there isn't a missing thumbscrew. This hole will be used by other accessories like the Micro Adjuster, which we'll look at a bit later on in the review.
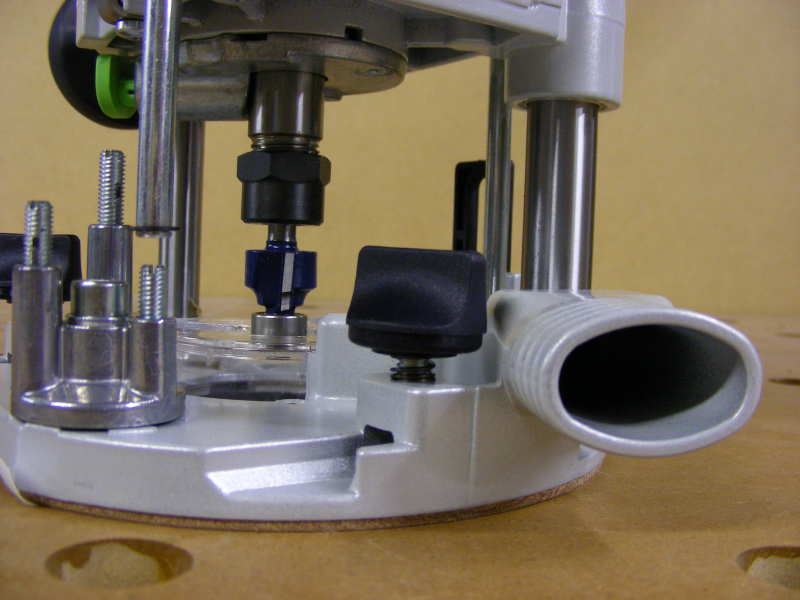 And
to close out this page, how could I forget to mention the vacuum port.
While it is less flexible than the port on the OF 1400, I somehow feel more
secure in that it is part of the base and I'm not going to pop or break it off.
Also in this and the last few pictures of the base you can see the clear plastic
dust shroud.
And
to close out this page, how could I forget to mention the vacuum port.
While it is less flexible than the port on the OF 1400, I somehow feel more
secure in that it is part of the base and I'm not going to pop or break it off.
Also in this and the last few pictures of the base you can see the clear plastic
dust shroud.
[Page 1][Page 2]
[Next]
[Home]