Page 2 of 3
Kreg Precision Miter Gauge
by
Bill Esposito
14 Aug 2004
Setup
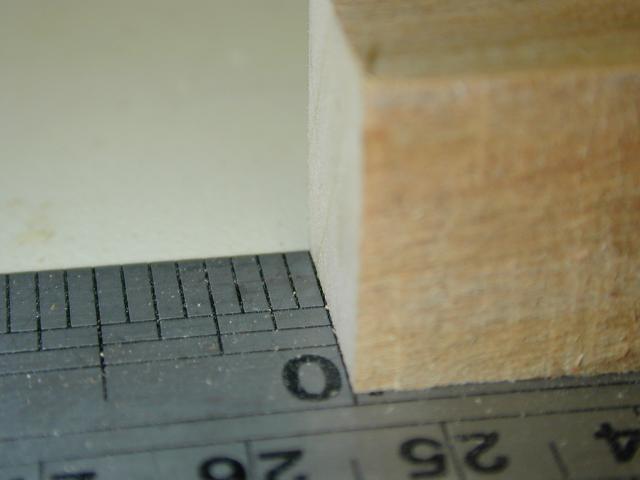  Probably the most tedious part of the standard setup
is aligning the cursor. Cursor you ask? Yes, what's different about the
stops on the Kreg Precision Miter Gauge is that the stops have a cursor
so you don't have to try to line up the stop position with the scale. The
photo at left shows the cursor at 10" on the scale and the photo on
the right shows the accuracy of that cursor. Probably the most tedious part of the standard setup
is aligning the cursor. Cursor you ask? Yes, what's different about the
stops on the Kreg Precision Miter Gauge is that the stops have a cursor
so you don't have to try to line up the stop position with the scale. The
photo at left shows the cursor at 10" on the scale and the photo on
the right shows the accuracy of that cursor.
To achieve that accuracy you need about a 12" piece of wood...It doesn't
matter how long it is exactly, we just need enough to work with and make
a few test cuts. It needn't be that wide either. I used a 3/4" square
cutoff.
Here's the process I used which differs from the instructions in that I
fix the fence position first while the instructions have you adjust the
stop position by moving the fence.
-
Lock your fence down about 3/4"-7/8" away from the left
side of your blade. That should give you enough room to swing your
miter gauge through all of the angles and allow you to make a 3/4"
dado as well. Always make sure when you change blades or install
a dado set that the fence isn't going to hit the blade.
-
Measure that test piece of wood. Now place the wood against the teeth
of the blade and adjust the flip stop so that it touches the other
end of the test piece. Lock the stop down.
-
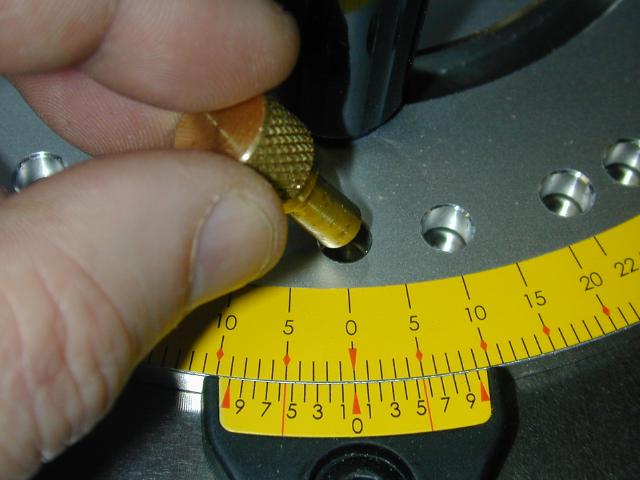
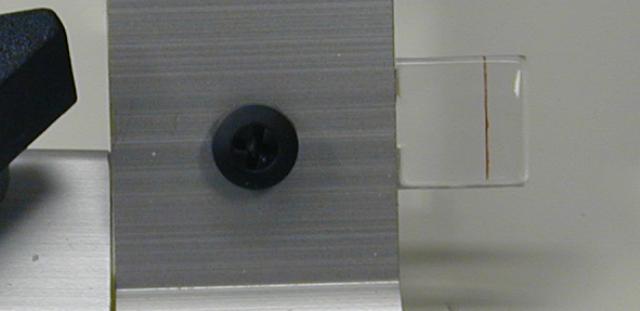 Adjust the cursor by loosening
up the screw (right photo) and set the cursor so that it exactly
aligns with the measurement of the test piece. Adjust the cursor by loosening
up the screw (right photo) and set the cursor so that it exactly
aligns with the measurement of the test piece.
-
Now loosen the stop and move it closer to the blade, align the cursor
exactly, lock it down and make another test cut. You should get the
same accurate results as I did. If not, make the appropriate adjustment
to the cursor and repeat this step again.
Now we're ready to make some sawdust!
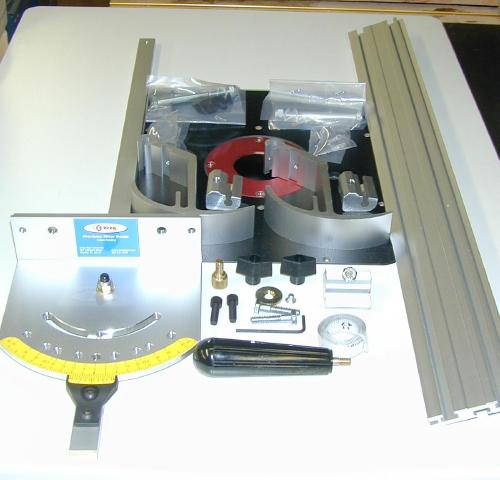
Features
Before we get into the testing of the gauge let's look at some of the
features of the Kreg Precision Miter Gauge which haven't been discussed
thusfar.
  Miter Angle Stops. While you can loosen
the handle and infinitely adjust the gauge from +60° to -60°, the
Kreg provides accurate positive stops at +/- 0, 10, 22.5. 30 and 45 degrees
by way of a hole and a pin. Loosen the handle, swing the gauge, and drop
the pin in at the desired angle and you have set an accurate, repeatable
angle. Miter Angle Stops. While you can loosen
the handle and infinitely adjust the gauge from +60° to -60°, the
Kreg provides accurate positive stops at +/- 0, 10, 22.5. 30 and 45 degrees
by way of a hole and a pin. Loosen the handle, swing the gauge, and drop
the pin in at the desired angle and you have set an accurate, repeatable
angle.
 Vernier Scale. The Kreg Jig also provides
a vernier scale so that you can make accurate adjustments in increments
if 1/10th of a degree. Vernier Scale. The Kreg Jig also provides
a vernier scale so that you can make accurate adjustments in increments
if 1/10th of a degree.
Some folks may have never used a vernier scale, for the unaccustomed, this
next set of photographs walks you through using the vernier in five, 1/10th
increments. It may be a little confusing at first but the practical application
that follows should clear it all up.
 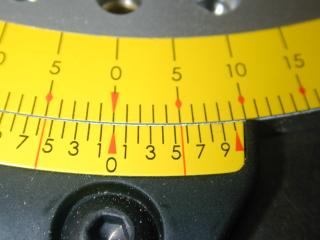  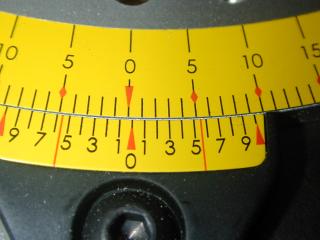  
In the first photo above and on the left the zeroes are lined up and
that on the lower vernier scale the mark at zero is the only mark which
will align exactly with a mark on the upper scale.
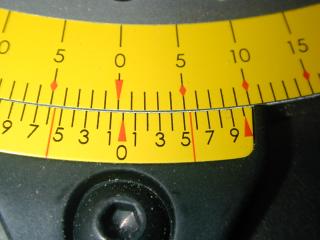
Now we swing the upper scale to the left, always moving towards the larger
angle, until the first mark to the right of zero on the vernier scale aligns
with a mark on the upper scale (photo 2nd from left). Notice that the mark
at 1 on the lower vernier scale lines up with the 1 on the upper scale.
That is 1/10th degree.
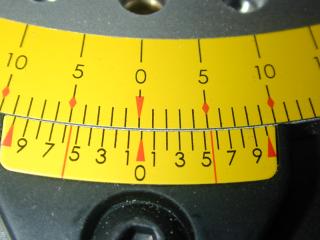
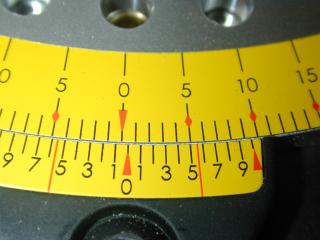
Swing the upper scale to the left again until the 2 on the lower scale
lines up with the 2 on the upper scale (3rd photo from left). That is 2/10th
degree.
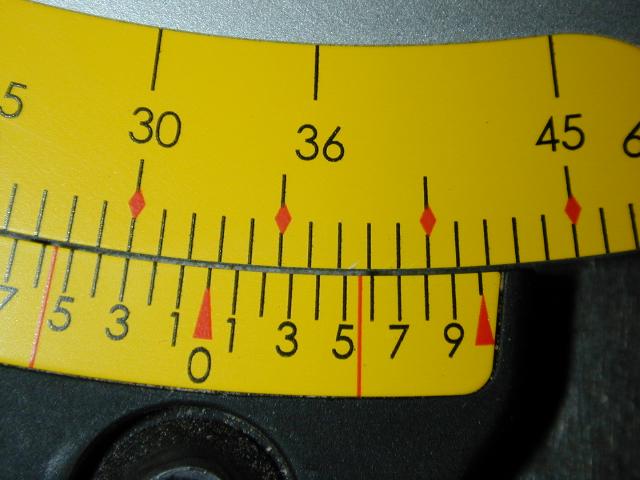
Swing the upper scale again until the 3 on the vernier scale lines up with
the 3 on the upper scale (4th photo from left). That is 3/10th degree.
Swing the scale again until the 4 lines up to equal 4/10ths (5th photo
from left) and the 5 lines up to make it 5/10ths (photo on right). You
can do this all the way to 9/10's and it works at any angle.
It may seem confusing but once you do it a few times it is quite natural.
Here's a practical application.
 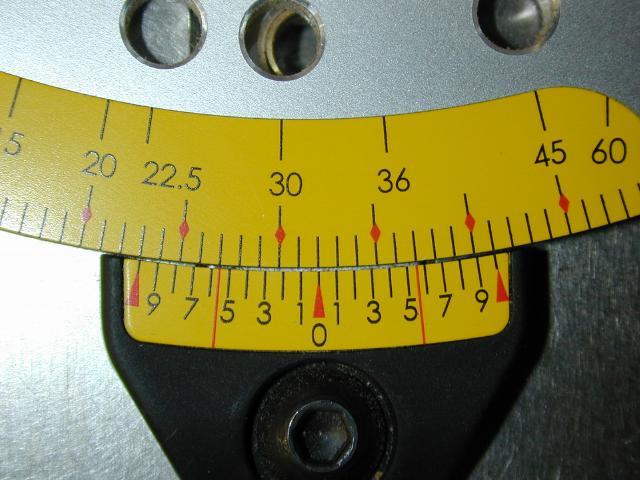 We need
to make a cut at 32.7 degrees. We start out by aligning our scales to 32
degrees by setting our lower 0 pointer at 32 (photo left). Notice that
when the zero pointer on the lower scale is set to 32, it is the only mark
that lines up on that scale. We then locate the 7 on the vernier scale
and move the gauge towards the larger angle (towards 33 and not 32) stopping
on the first mark that lines up with the 7 (right). That's it, 32.7 degrees. We need
to make a cut at 32.7 degrees. We start out by aligning our scales to 32
degrees by setting our lower 0 pointer at 32 (photo left). Notice that
when the zero pointer on the lower scale is set to 32, it is the only mark
that lines up on that scale. We then locate the 7 on the vernier scale
and move the gauge towards the larger angle (towards 33 and not 32) stopping
on the first mark that lines up with the 7 (right). That's it, 32.7 degrees.
While working on this section of the review I noticed what I thought to
be excessive play in the pin/hole. See the Product Update section
of this review for information and resolution.
 Micro-Adjusting to 1/100th of a degree.
The included instructions have a section entitled "Reality Check"
where they talk about how accurate you really need to be. Because there
are occasions when making multi-sided boxes and the like the compounding
of 1/100th errors might be visible, Kreg has included a way to fine tune
your gauge. Micro-Adjusting to 1/100th of a degree.
The included instructions have a section entitled "Reality Check"
where they talk about how accurate you really need to be. Because there
are occasions when making multi-sided boxes and the like the compounding
of 1/100th errors might be visible, Kreg has included a way to fine tune
your gauge.
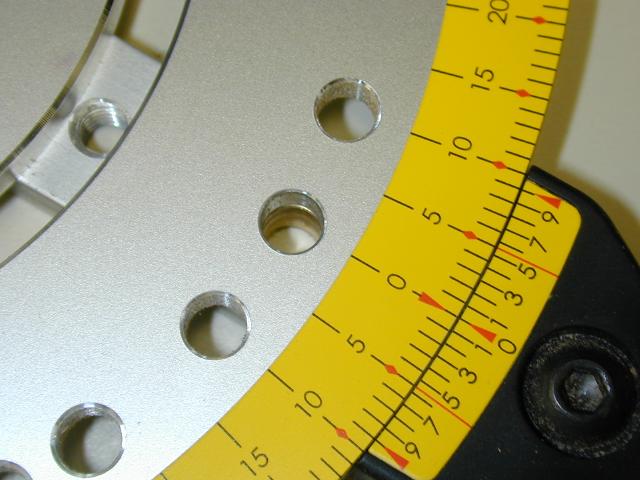
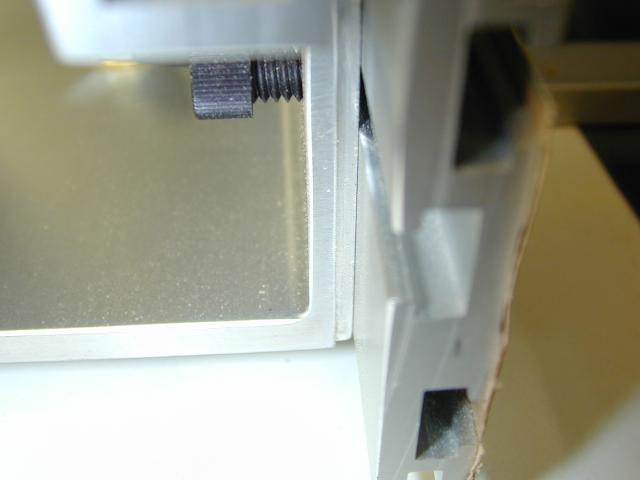
Basically you use the nylon hex screw to push the fence away from the gauge.
The process a little cumbersome and involves using a clamp but it works.
For every 1/100" you adjust the fence, you add 1/100 of a degree to
your angle. You can measure this gap by using either a feeler gauge or
a inside measuring caliper. In the picture at right, you can see a machined
step which can be used with your calipers to measure the displacement.
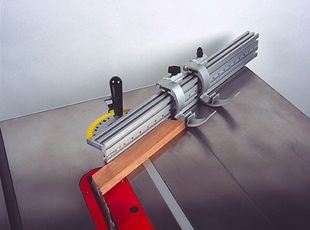
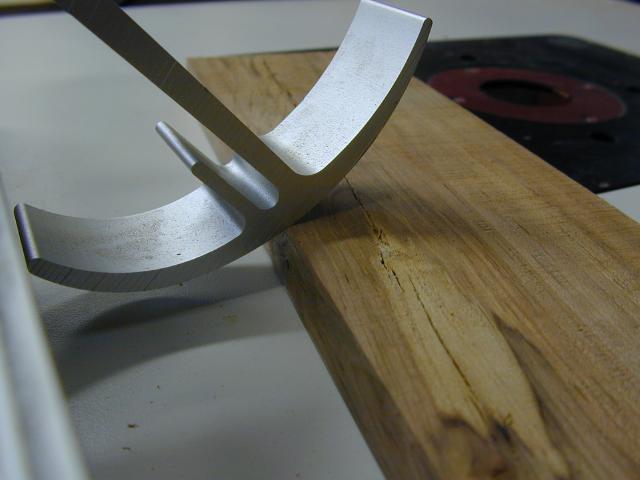 Curved
Stop. Ever wonder why the stops are that strange curved shape? That
curve allows for the work to slide under the stop without you having to
manually raise it out of the way. This is very useful when you need to
square one end of the board before cutting it to length. Just slide the
board up against the fence and square the end, then flip the board around
putting the squared end against the stop and cut the other end to length. Curved
Stop. Ever wonder why the stops are that strange curved shape? That
curve allows for the work to slide under the stop without you having to
manually raise it out of the way. This is very useful when you need to
square one end of the board before cutting it to length. Just slide the
board up against the fence and square the end, then flip the board around
putting the squared end against the stop and cut the other end to length.
[Page 1] [Page 2] [Page
3]
[Home]
14 Aug 2004
Copyright © 2004 , Bill Esposito.
All Rights Reserved.
|